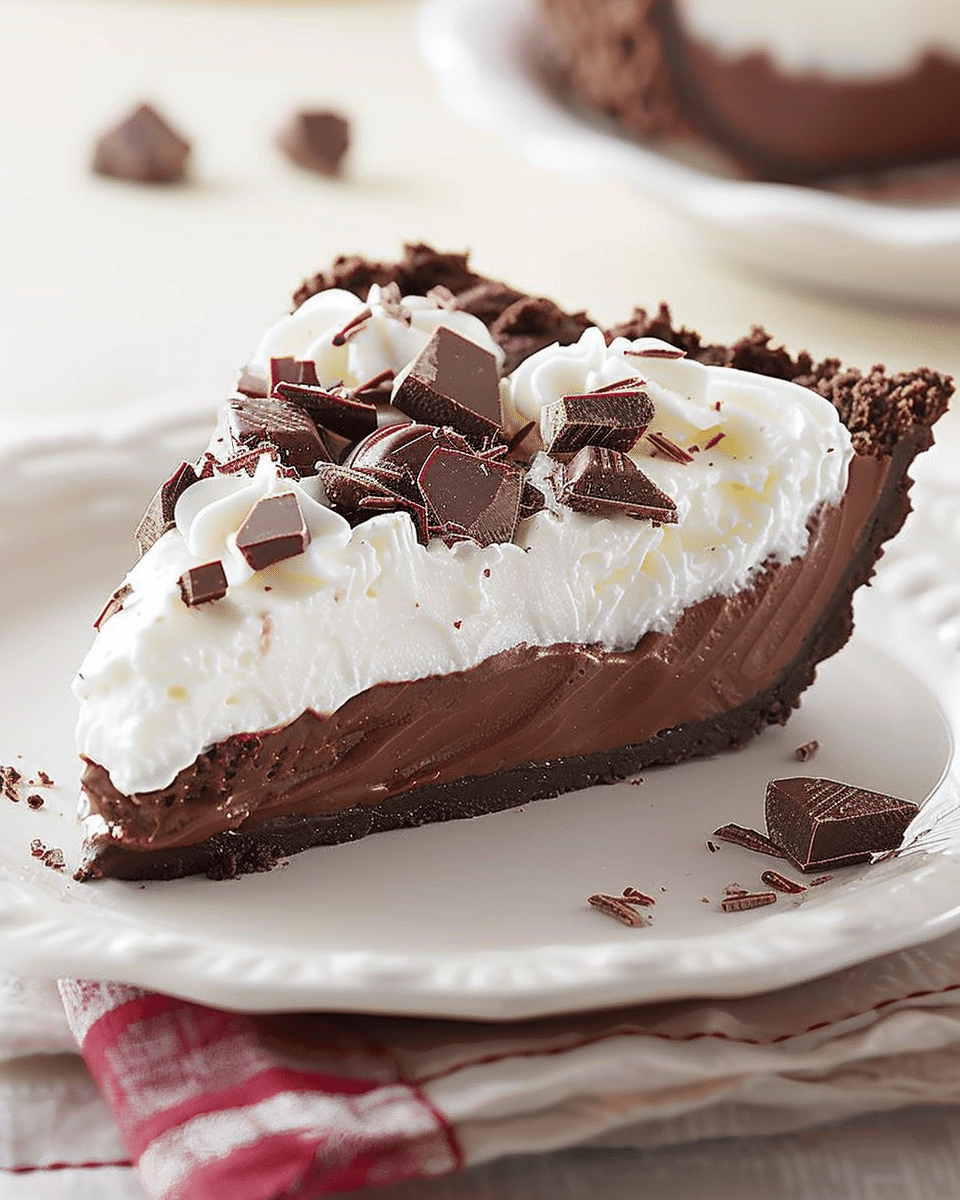
A creamy, indulgent dessert with a rich chocolate filling and a cookie crust, this No-Bake Chocolate Icebox Pie is the kind of effortless treat I love to make ahead. It sets in the refrigerator—no oven required—and finishes off beautifully with a topping of whipped cream. Whether I’m prepping for a gathering or just satisfying a serious chocolate craving, this pie delivers every time.
Why You’ll Love This Recipe
I like how quick and straightforward this recipe is—no baking involved, just a little mixing and chilling. The texture is smooth and fluffy, thanks to the whipped cream, while the deep chocolate flavor is intensified by a touch of sour cream and (optionally) instant coffee. It’s the kind of pie that feels decadent without the stress, and I appreciate how it can be made in advance and still taste freshly made.
ingredients
(Here’s a tip: Check out the full list of ingredients and measurements in the recipe card below.)
1 (9‑inch) Oreo or chocolate cookie crust (pre‑made or homemade)
8 oz (225 g) cream cheese, softened
8 oz (225 g) semi‑sweet or dark chocolate, chopped
I start by preparing the cookie crust—if it’s a pre-made no-bake crust, I just chill it in a 9-inch pie plate.
Then I melt the chopped chocolate with ½ cup of heavy cream in the microwave, stirring every 20–25 seconds until smooth. If I’m adding instant coffee, this is when I stir it in.
In a separate bowl, I whip the remaining 1 cup of heavy cream with ¼ cup powdered sugar until stiff peaks form, then I set that aside.
I beat the softened cream cheese until creamy, then mix in the cooled chocolate mixture until smooth.
Next, I blend in the remaining ½ cup powdered sugar, sour cream, and vanilla extract until it’s all well combined.
I gently fold in the whipped cream from earlier, making sure no streaks remain.
I spread the filling into the chilled crust and smooth out the top with a spatula.
The pie goes into the fridge to set for at least 6 hours or overnight.
Before serving, I top it with extra whipped cream or chocolate shavings to dress it up.
Servings and timing
This pie yields about 8–10 slices. It takes only 20 minutes to prepare, but I let it chill for at least 6 hours—overnight is even better. Since it doesn’t need baking, it’s great when I want to keep the kitchen cool.
Prep Time: 20 minutes
Cook Time: 0 minutes
Chill Time: 6 hours
Total Time: 6 hours 20 minutes
Yield: 8–10 slices
Variations
I sometimes swap the Oreo crust for a graham cracker crust if I want something less chocolatey. For a mocha twist, I add the optional instant coffee and even top it with a drizzle of coffee liqueur. If I’m feeling festive, I stir in crushed peppermint candy during the holidays or sprinkle toffee bits on top for crunch. This pie is super adaptable to whatever I have on hand.
storage/reheating
I always keep the pie covered in the refrigerator, where it stays fresh for 3–4 days. I let it sit at room temperature for about 10 minutes before slicing—it cuts much easier that way. Since it’s a no-bake pie, I don’t reheat it, but I’ve found it freezes well too. I just make sure to wrap it tightly and thaw it overnight in the fridge.
FAQs
How do I know when the pie is fully set?
I usually check if the center feels firm to the touch. After 6 hours in the fridge, it should be sliceable without being runny.
Can I make this pie ahead of time?
Yes, I often make it the night before a party. It holds up great overnight in the refrigerator.
Is the instant coffee necessary?
It’s totally optional—I like it because it deepens the chocolate flavor, but it doesn’t make the pie taste like coffee.
Can I use milk chocolate instead?
Yes, though I prefer semi-sweet or dark for a richer flavor. Milk chocolate will make the pie sweeter and less intense.
Can I use a hand mixer instead of a stand mixer?
Absolutely. I use a hand mixer for the cream and filling, and it works perfectly fine.
Conclusion
This No-Bake Chocolate Icebox Pie is my go-to dessert when I want something that feels luxurious but takes minimal effort. With its creamy filling, rich chocolate taste, and cool, refreshing texture, it’s the kind of dessert I find myself making again and again. Whether it’s for a gathering or just a weeknight treat, it never disappoints.
Prepare or chill the cookie crust in a 9‑inch pie plate (do not bake if it’s already a no‑bake crust).
In a microwave‑safe bowl, combine the chopped chocolate and ½ cup (118 ml) of heavy cream. Microwave in 20‑25 second bursts, stirring in between, until smooth. Let cool slightly. (Optional: stir in instant coffee.)
In a bowl, whip the remaining 1 cup (236 ml) heavy cream with ¼ cup (30 g) powdered sugar until stiff peaks form. Set aside.
Beat the softened cream cheese in a separate bowl, then pour in the cooled chocolate mixture. Mix until smooth and combined.
Add the remaining ½ cup powdered sugar, sour cream, and vanilla extract, and blend until smooth.
Gently fold in the whipped cream from step 3, until no white streaks remain.
Spread the filling into the chilled crust, smoothing the top with a spatula.
Refrigerate for at least 6 hours or overnight until fully set.
Before serving, top with additional whipped cream or chocolate shavings if desired.
Notes
Be careful when melting chocolate — stir frequently to avoid seizing.
The instant coffee is optional but deepens the chocolate flavor without making it taste like coffee. :contentReference[oaicite:0]{index=0}
You can use a store‑bought crust, but many homemade crusts hold the filling better. :contentReference[oaicite:1]{index=1}
Let the pie sit at room temperature for ~10 minutes before slicing for easier cutting.
Store covered in the refrigerator; best eaten within a few days.


