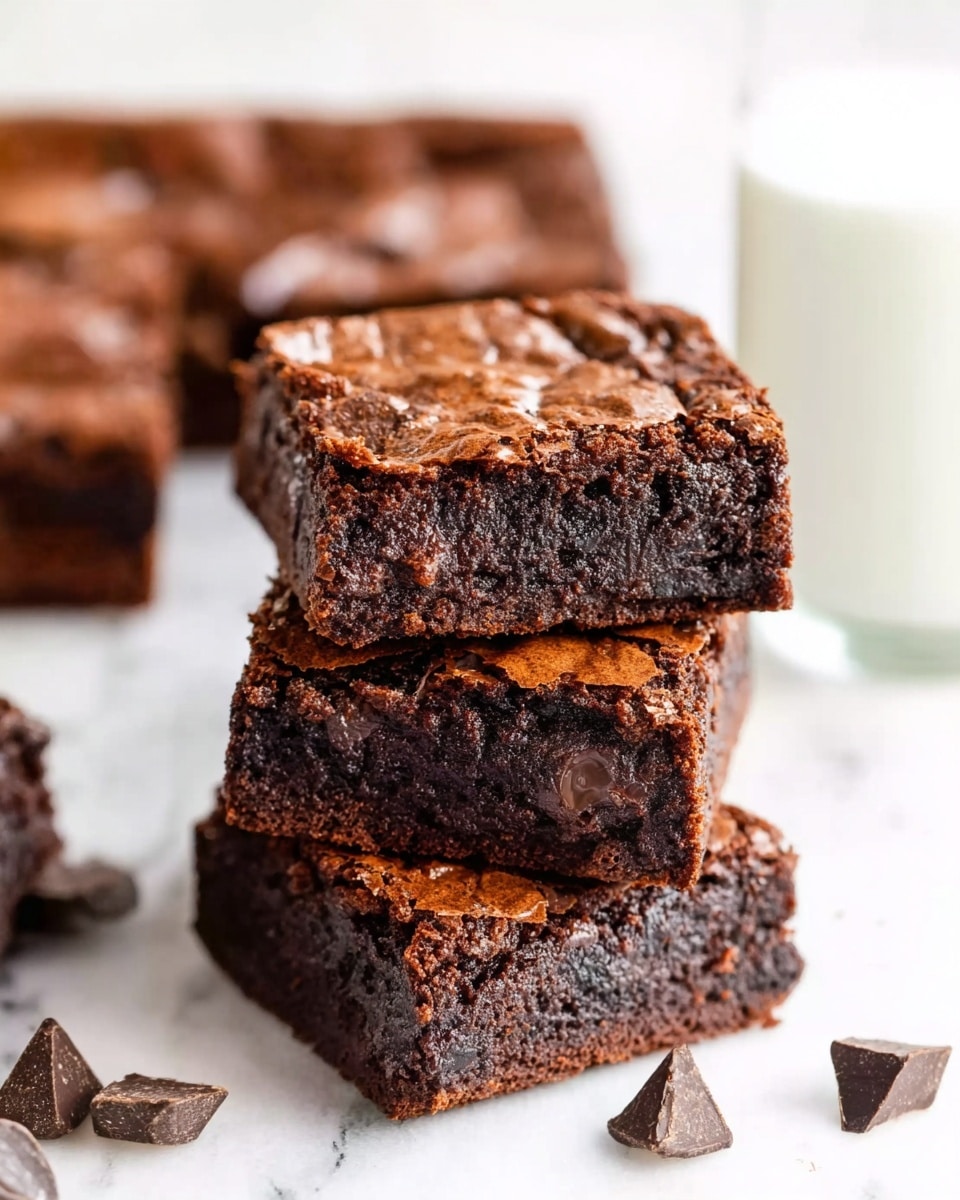
I love creating desserts that feel indulgent and rich, and these fudgy egg-free brownies are exactly that. They come out dense, moist, and intensely chocolatey without using any eggs, making them perfect for anyone with dietary restrictions or simply when I run out of eggs at home. Every bite feels decadent, with that perfect balance between gooey and firm.
Why You’ll Love This Recipe
I appreciate how simple and reliable this recipe is. I don’t need any fancy substitutes, and the ingredients are pantry-friendly. The texture turns out beautifully fudgy every time, which is exactly what I look for in a brownie. I also like how adaptable it is, whether I want to add nuts, chocolate chips, or keep it classic. Plus, it’s quick to prepare, which makes it perfect when I crave something sweet without spending hours in the kitchen.
ingredients
(Here’s a tip: Check out the full list of ingredients and measurements in the recipe card below.)
1 cup (200 g) granulated sugar
1/2 cup (120 ml) milk (dairy or plant-based)
1/2 cup (115 g) unsalted butter, melted
1 teaspoon vanilla extract
1/2 cup (60 g) all-purpose flour
1/3 cup (30 g) unsweetened cocoa powder
1/4 teaspoon salt
1/2 teaspoon baking powder
1/2 cup (90 g) chocolate chips
directions
I start by preheating the oven to 180°C (350°F) and lining a square baking pan with parchment paper. This helps me remove the brownies easily later.
In a mixing bowl, I combine the melted butter and sugar, stirring until smooth. Then I add the milk and vanilla extract, mixing everything together until well blended.
In another bowl, I whisk together the flour, cocoa powder, salt, and baking powder. I gradually add the dry ingredients into the wet mixture, stirring gently until I get a thick, smooth batter.
Next, I fold in the chocolate chips, making sure they’re evenly distributed. I pour the batter into the prepared pan and spread it out evenly.
I bake the brownies for about 20–25 minutes. I like to check them with a toothpick; I want a few moist crumbs for that fudgy texture. After baking, I let them cool completely before slicing.
Servings and timing
I usually get about 9 to 12 brownies from this recipe, depending on how I cut them.
Preparation time takes around 10 minutes, and baking takes about 20–25 minutes. In total, I spend roughly 35 minutes from start to finish, plus cooling time.
Variations
I sometimes like to switch things up depending on my mood. I can add chopped walnuts or pecans for a crunchy texture. If I want extra richness, I mix in white chocolate chunks or swirl in peanut butter before baking. For a deeper flavor, I occasionally add a teaspoon of instant coffee to enhance the chocolate taste.
storage/reheating
I store the brownies in an airtight container at room temperature for up to 3 days. If I want them to last longer, I refrigerate them for up to a week.
When I want to enjoy them warm again, I microwave a piece for about 10–15 seconds. This brings back that soft, gooey texture that I love.
FAQs
Can I make these brownies vegan?
I can easily make them vegan by using plant-based milk and replacing butter with vegan butter or oil.
Why are my brownies not fudgy?
If my brownies turn out too cakey, it’s usually because I overbaked them or added too much flour. I make sure to measure carefully and keep an eye on baking time.
Can I use oil instead of butter?
Yes, I can substitute melted butter with the same amount of neutral oil, though the flavor may be slightly different.
How do I know when the brownies are done?
I look for set edges and a slightly soft center. A toothpick should come out with a few moist crumbs, not completely clean.
Can I freeze these brownies?
I can freeze them by wrapping each piece individually and storing them in a freezer-safe container for up to 2 months. When I’m ready to eat, I thaw them at room temperature or warm them slightly.
Conclusion
I find these ultimate fudgy egg-free brownies incredibly satisfying and easy to make. They deliver everything I want in a brownie—rich flavor, soft texture, and a foolproof method. Whether I’m baking for dietary needs or just experimenting in the kitchen, this recipe never disappoints.


